How to SSH into UniFi APs: A complete guide
How to SSH into UniFi APs: Local, Remote, and Debug Tools
While the UniFi Network Application provides a robust GUI for provisioning and monitoring, comprehensive network administration often requires direct command-line execution. Secure Shell (SSH) access to UniFi Access Points (APs) allows administrators to bypass the controller to execute manual firmware upgrades, force adoptions, parse internal logs, and perform low-level diagnostics.
This article details the exact methods for accessing the shell on UniFi APs.
The network application version we are using for this blog is 10.3.58.
Device distinctions: Consoles & Gateways vs. Device SSH
Before initiating an SSH connection, it is critical to differentiate between UniFi OS Consoles/Gateways (e.g., UDM Pro, Cloud Key, UXG Pro) and UniFi Network Devices (e.g., APs, Switches).
- UniFi Consoles & Gateways: Utilize the username
rootand are managed via the UniFi OS Control Plane (Settings > Control Plane > Console). SSH is disabled by default. (Note: Gateways like the UXG will useroot, but the password will be the shared password set in your UniFi Network Application). - UniFi Network Devices (APs/Switches): Utilize an auto-generated username/password or SSH Key managed within the UniFi Network Application. SSH is enabled by default (both pre- and post-adoption).
This guide focuses exclusively on accessing UniFi Network Devices (APs).
Method 1: Direct SSH via Terminal (Local Access)
Direct terminal access is the standard protocol for devices residing on the same physical or routed network as the administrator.
Step 1: Determine Authentication Credentials
Unlike UniFi Consoles, APs have SSH enabled by default right out of the box.
- For Unadopted/Factory Default APs: They utilize hardcoded default credentials. Depending on the hardware generation, use
ubnt/ubntorui/ui. - For Adopted APs:
- Navigate to Devices tab -> Device Updates and Settings button.
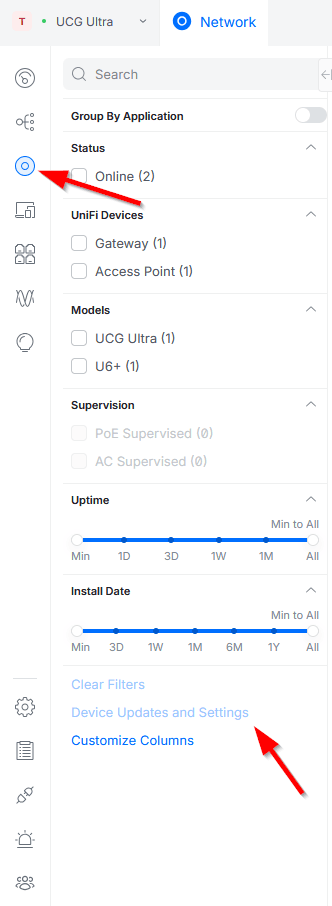
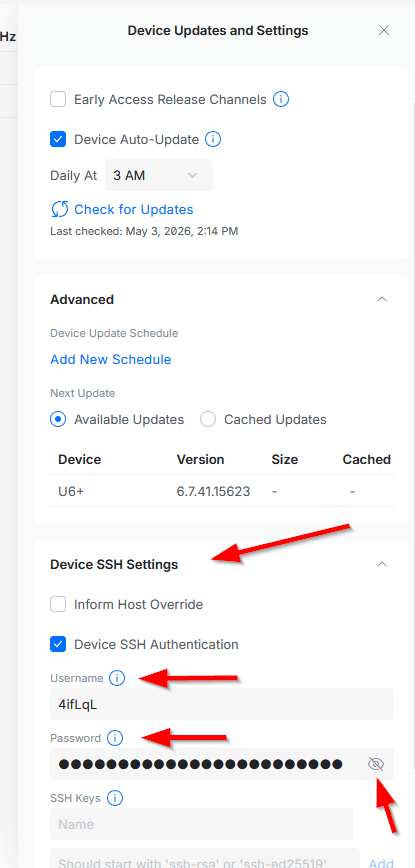
- A new window will open at the right side of the screen, scroll down just a bit and you will find the Device SSH Authentication.
- Click there and a new section will appear.
- Here, you will find an auto-generated username and password. You can use these immediately to initiate a connection. To view the password, click on the grey eye.
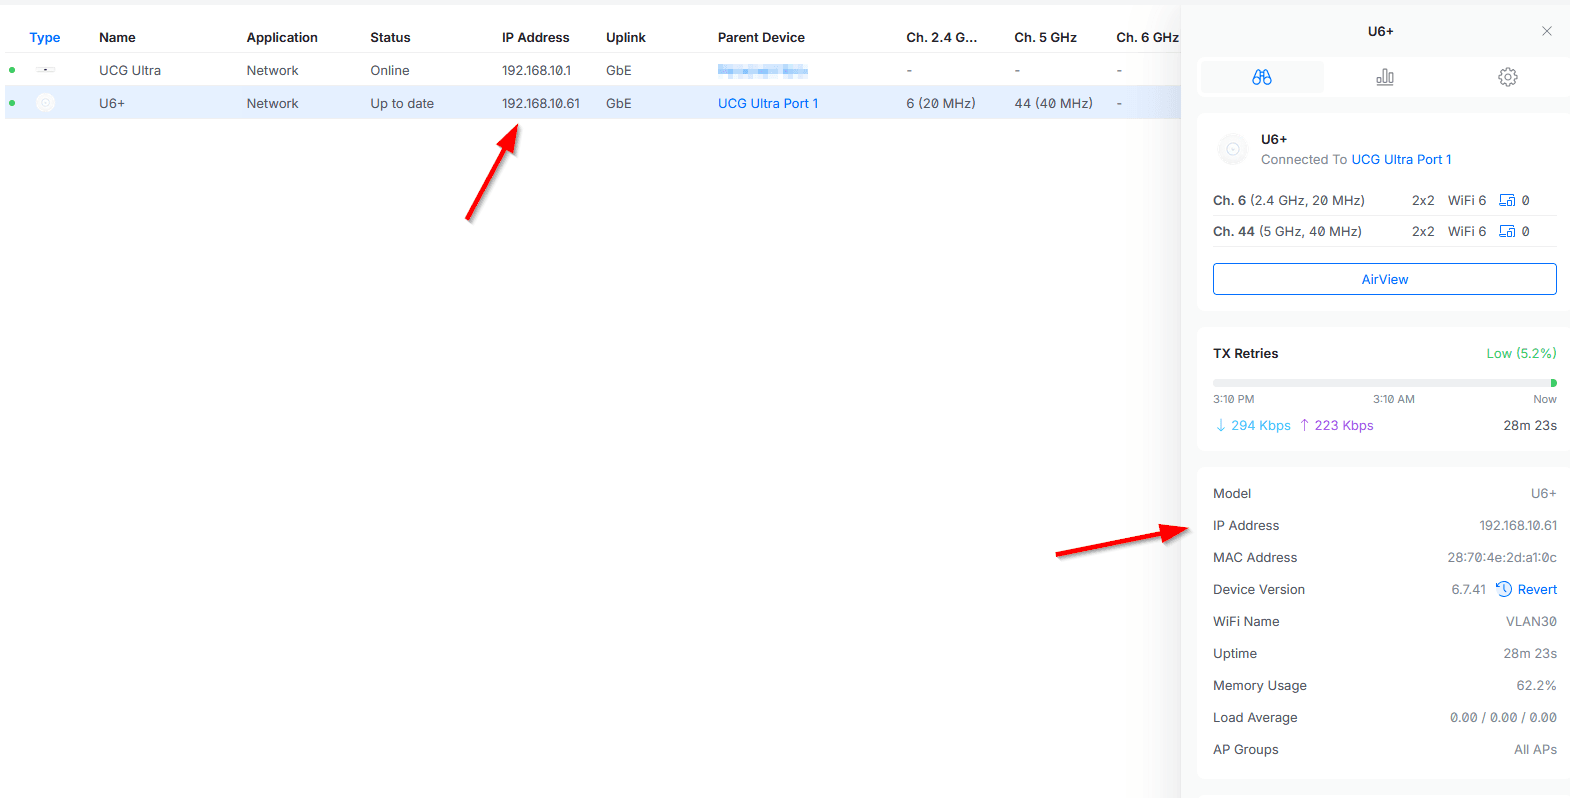
Step 2: Determine the AP Management IP
- If the device is already adopted by a controller, on the same Devices tab, you should see the IP address of the access point under the IP Address column or under the device properties.
-
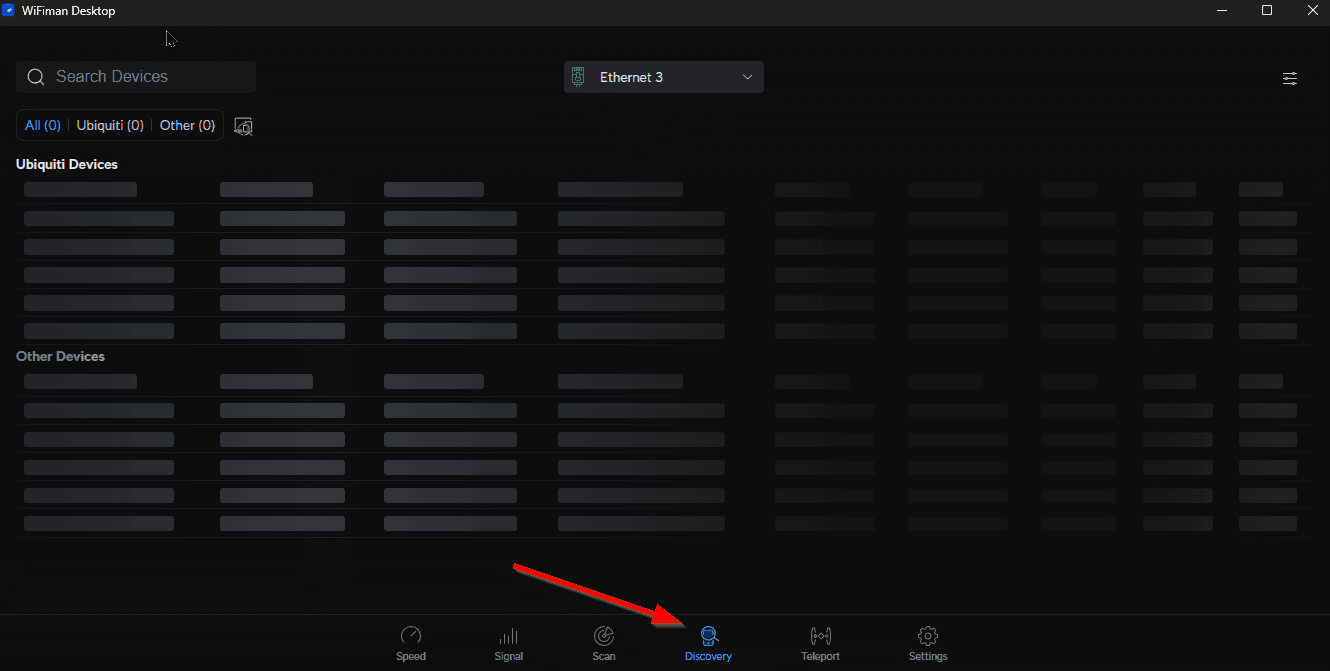
If the AP was not adopted by any controller yet, you can use any network discovery tool to find the IP on the network, the best method will be using the WiFiMAN app from Ubiquiti Desktop version : https://ui.com/download/app/wifiman-desktop For the mobile version, check the App Store or Google Play
- Once you open the WiFiman app, open the discovery tab, the app will start the discovery and once it's finished, UniFi devices in the network should appear, make sure the device you use it's on the same network as the UniFi device you are trying to discover.
Step 3: Initiate the SSH Session
Open a terminal emulator (macOS/Linux native terminal, or PuTTY/PowerShell on Windows) and execute:
ssh <username>@<AP-IP-Address>
In the example below I'm using PowerShell, if it's the first time you connect, you will receive a warning about the authenticity of the host, since we are sure it's the AP we want to connect, we just need to type yes, and then we will be prompt for the password.

Upon successful authentication, the system drops into the AP's BusyBox shell.

Method 2: Remote Access via UniFi Debug Tools
Ubiquiti provides a web based console tunnel directly through the UniFi Network interface. This can be used if you are not connected to the management network of the AP, for example, you might be checking your devices with Site Manager remotely.
In newer versions debug tools are enabled by default, but in older versions you might need to enable it first.
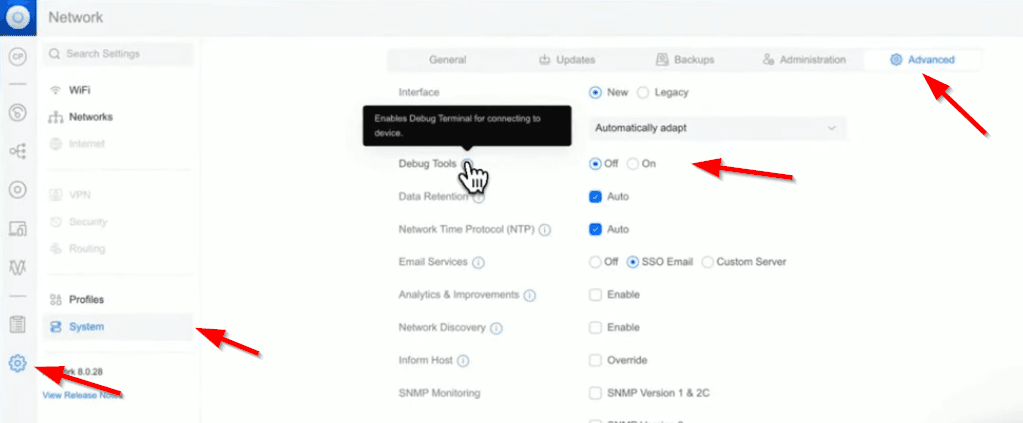
Step 1: Enable Debug Tools
- Navigate to Settings > System > Advanced.
- Toggle Debug Tools to the active state.
- Click Apply Changes.
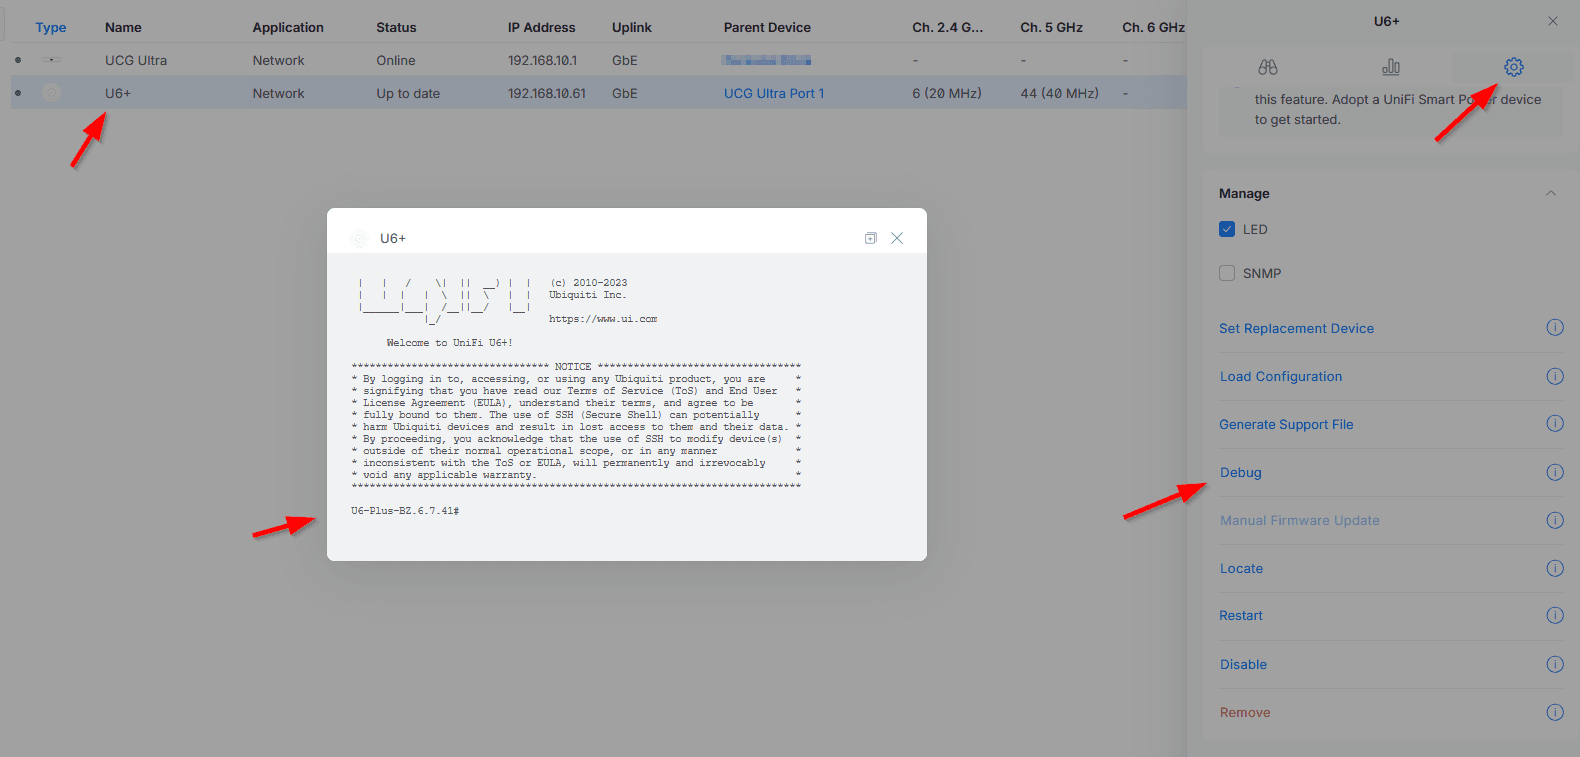
Step 2: Launch the session
- Navigate to the Devices interface and select the target AP.
- Select the Settings tab within the device properties panel.
- Scroll down and execute the Debug function.
- A terminal overlay will render within the browser, establishing an authenticated SSH session without requiring local network traversal.
Core Administrative Commands
Once authenticated to the AP shell, the following commands execute critical diagnostic and recovery functions:
# Diagnostic Commands
info                            # Outputs current firmware, MAC, IP, and controller inform status
ifconfig                        # Enumerates logical and
physical interfaces
cat /var/log/messages           # Dumps system logs for granular troubleshooting

# Provisioning & State Commands
set-inform http://<ip>:8080/inform # Forces adoption communication. MUST utilize HTTP, not HTTPS.
reboot                          # Initiates a graceful system restart
set-default                     # Modern syntax for a complete factory reset
syswrapper.sh restore-default   # Legacy syntax for a complete factory reset
Summary
In short, SSH gives you the keys to the kingdom when the standard web UI just isn't quite enough. Whether you're physically on-site dropping into your terminal or using UniFi's Debug Tools from halfway across the world, having command-line access is essential for deep diagnostics, forcing tricky adoptions, and resetting stubborn access points.
When does Managed UniFi hosting make more sense?
Managing UniFi at scale introduces operational risk: inconsistent versions, manual backups, expiring certificates, and hardware failures. Many MSPs move to hosted UniFi controllers to centralize infrastructure while retaining full network control.
If you’re tired of managing controllers yourself or need better tools for remote sites, we built UniHosted to solve exactly that. Our managed UniFi hosting services include debug tools and remote access out of the box, letting you focus on the network instead of the server.